Recently I have been loving lipsticks and lip pencils! I must admit, the darker colors have been my favorite for the winter season, but I love a nude, "my lips but better" color just as much! I though it would be fun and interesting to start a new series on this blog that I will do once a month! I call it "Opposites Attract" hence the title of this blog! haha Basically I want to take an aspect of beauty and talk about two of my favorite products or combinations on completely opposite ends of the spectrum.
For the first edition, I wanted to do lips! I have been so excited to share what I think is the perfect matte red lip combination and the perfect nude lip combination. It has been a long search, but I have finally fallen in love with the products that I am going to share with you today. (Though I am always experimenting and searching for new, exciting colors.) So whether you are a looking for a bold or natural lip look, you can find great options here.
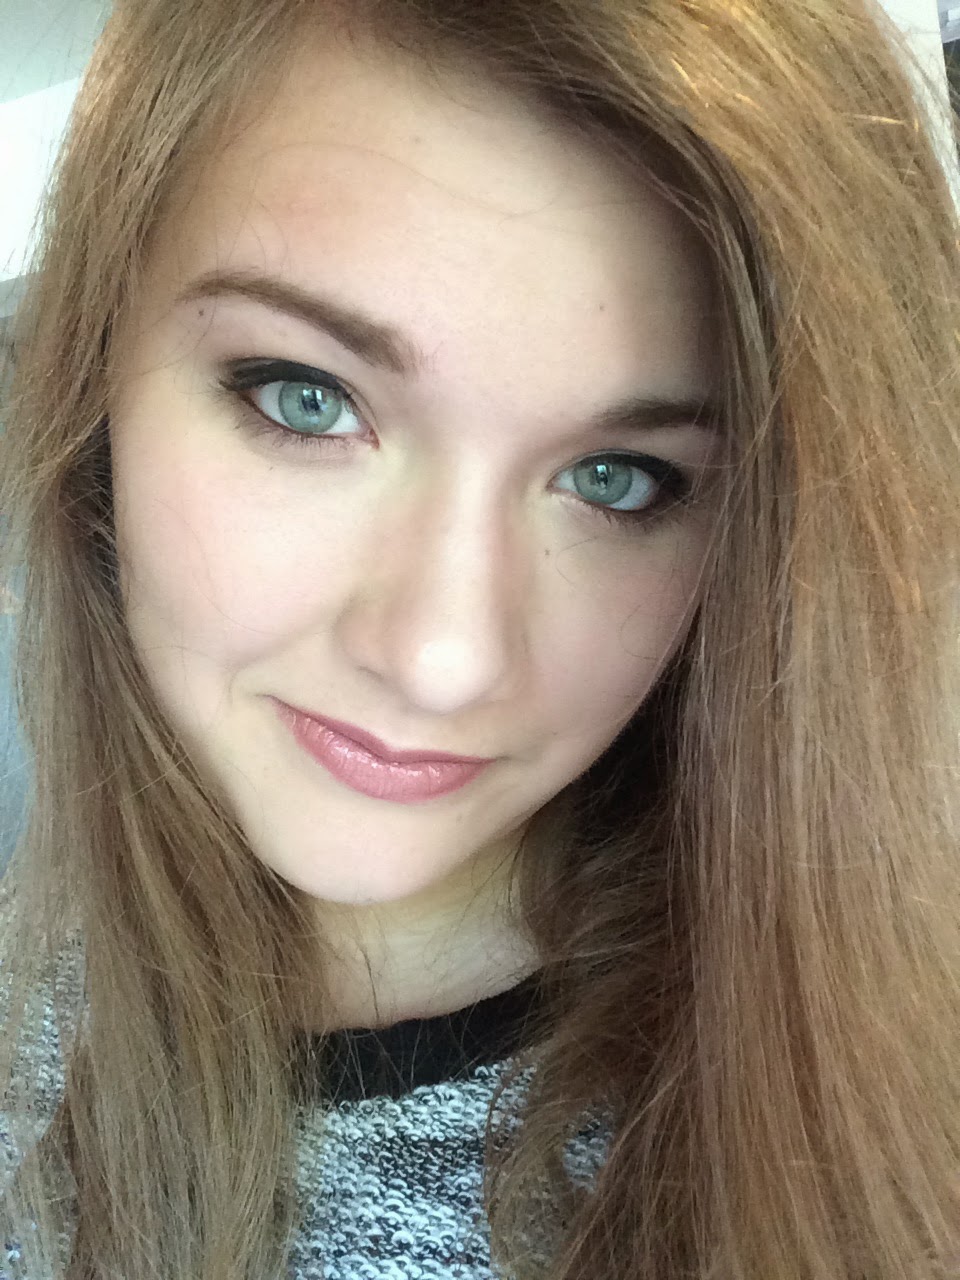
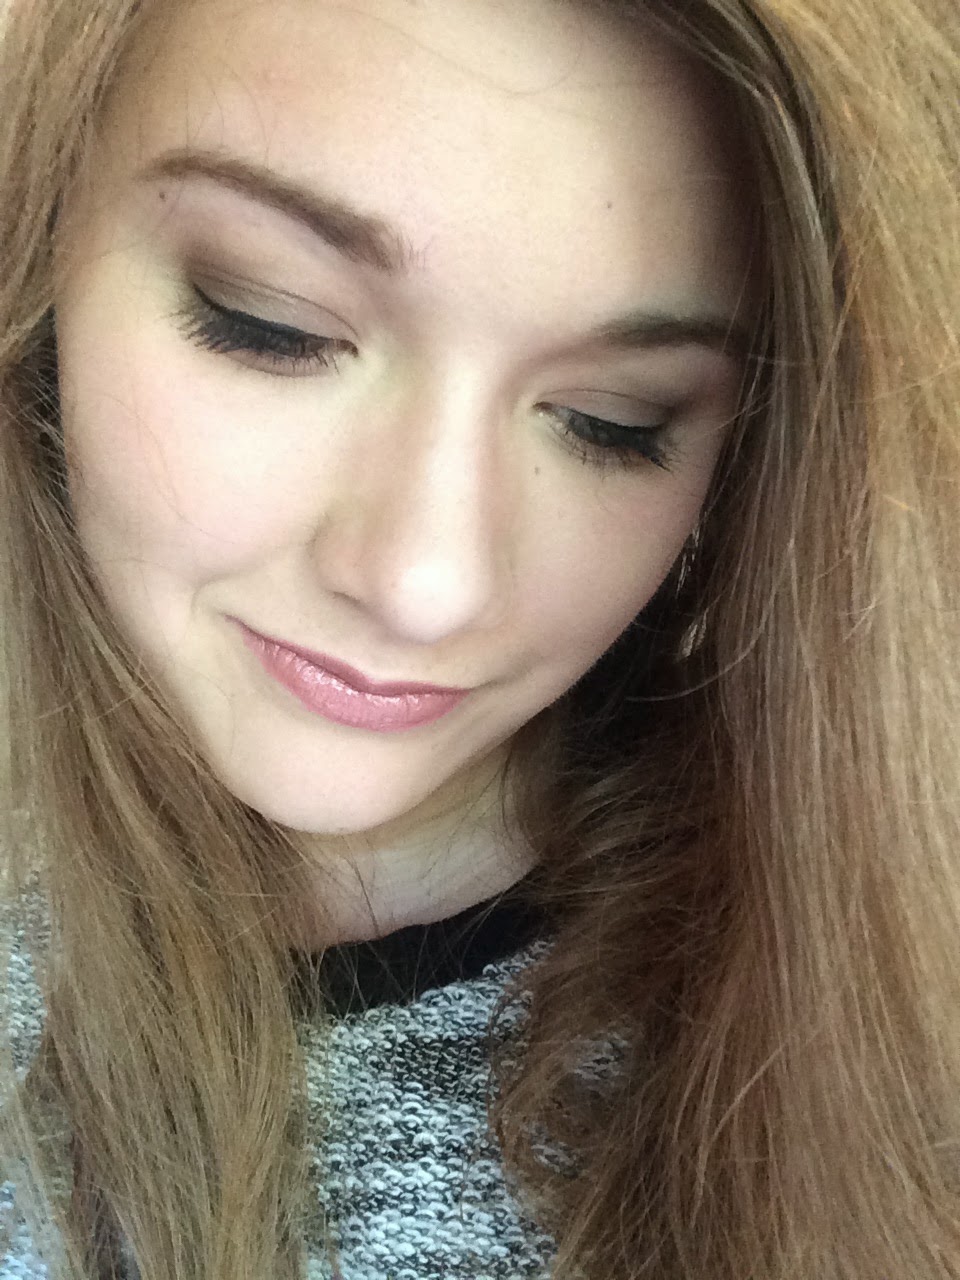
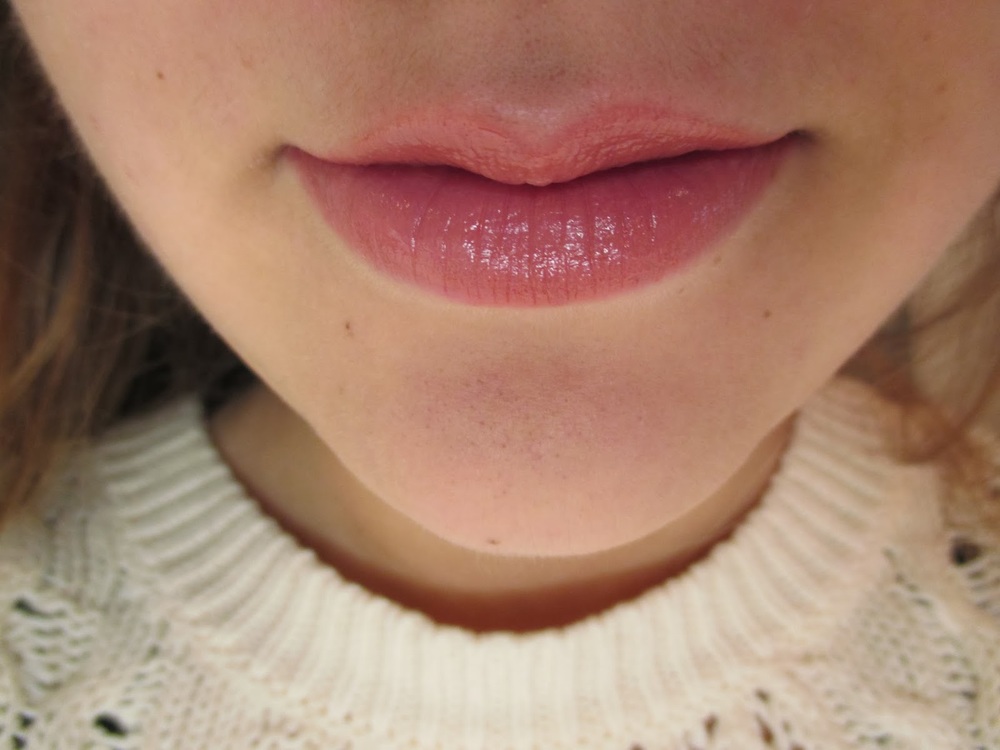
First Up: The Perfect Nude
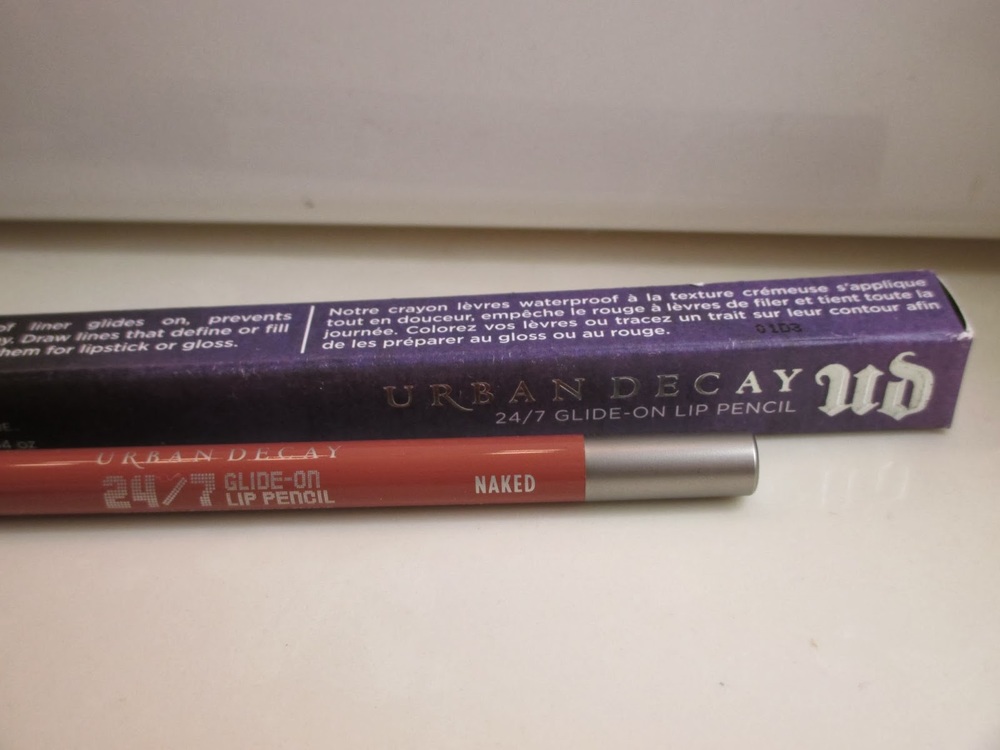
There were a couple different options and combinations that I really liked. I love the Urban Decay Lip Gloss in the shade "Naked" as well to layer over the top. This lip pencil also looks amazing underneath the Bare Minerals Marvelous Moxie Lipstick in "Take Charge". I did a full review of that lipstick as well if you would like to check it out HERE. However, I think this super simple combo gives me the color I am happiest with. It truly matches the natural color of my lips but makes them seem much more glamorous.
First, I line my lips with the Urban Decay 24/7 Glide-On Lip Pencil in "Naked" I love this product. It is so creamy and soft. The color is beautiful and because of the texture is is easy to apply. It shows up as a matte color and layers perfectly underneath a lip gloss or lipstick.
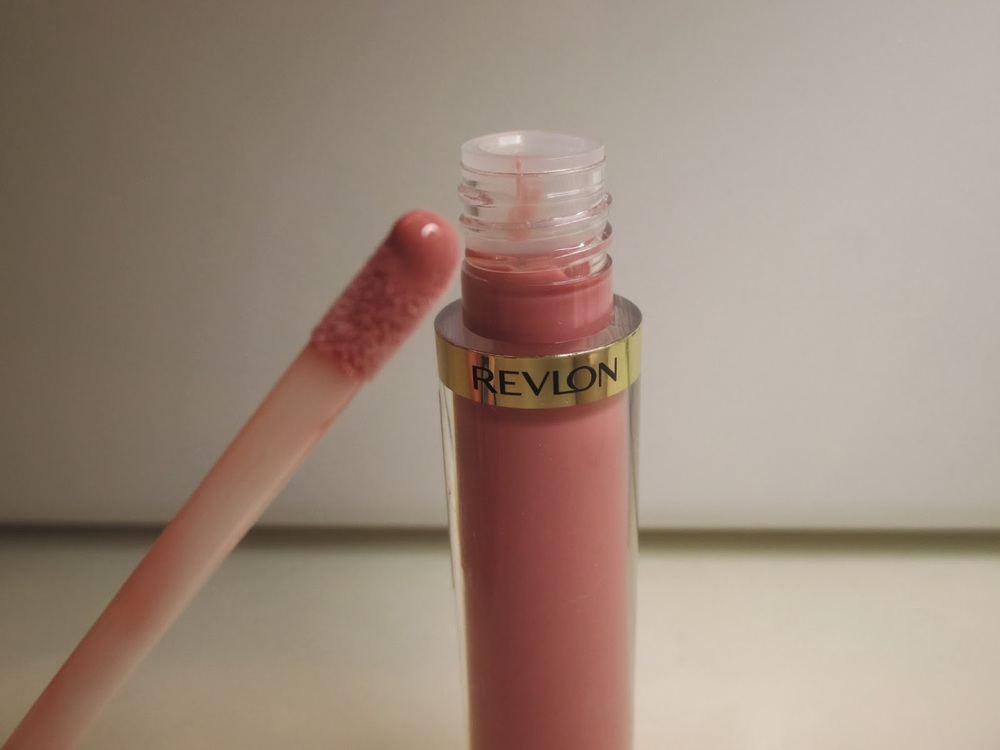
Then, I simply apply Revlon's Super Lustrous lip gloss in shade "215 Super Natural". The color is a beautiful natural pink that is incredibly pigmented, but the best part about this product is how moisturizing and creamy it is! About an hour after the first time I wore this, I couldn't believe how moisturized and soft my lips felt. I thought that I had applied one of my favorite chap sticks or lip balms, but soon remembered it was just this incredible gloss.


Together, the two of these products make an amazing combination. Here are the swatches on both my hand and lips!
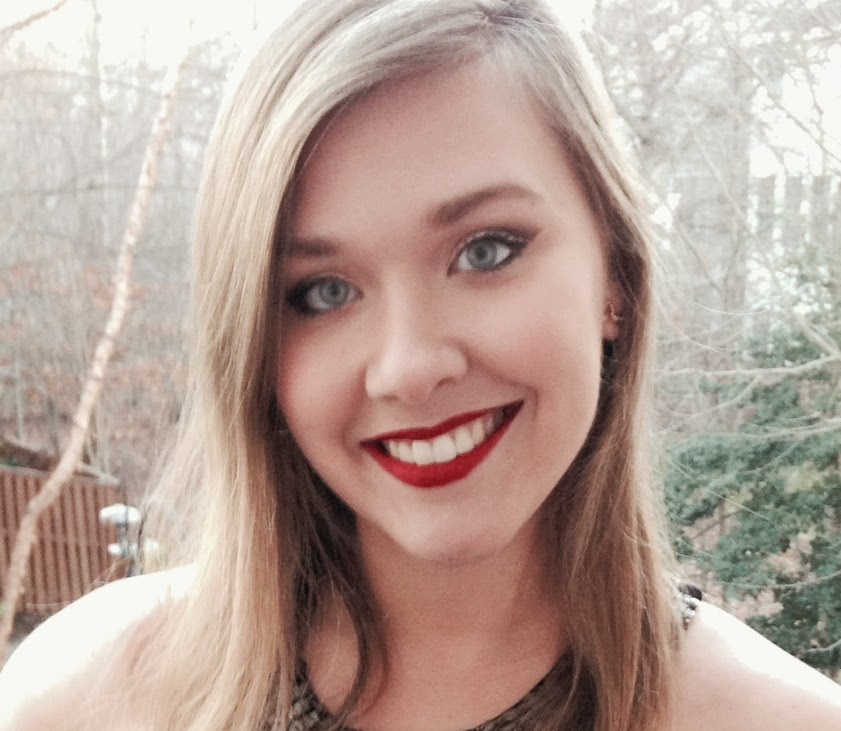
Second Up: The Perfect Matte Red
I have bought countless red lipsticks expecting them to result in the color that these products give me, however I was always disappointed with a color that was too orange, too bright, too blue or just not what I was looking for. Never fear, because the perfect matte red color is finally here!
The first product I used is the NYX lip liner in "SPL817 Hot Red". It is a normal lip liner pencil, meaning it does not have the creamy consistency that the Urban Decay lip pencils have, but the color is gorgeous and once it is on your lips it doesn't budge.
Then I apply the most beautiful matte red lipstick ever! I discovered this color from two of my favorite beauty guru's Zoella and Tanya Burr, I will link their blogs below! It is the Rimmel Long Lasting Lipstick by Kate in the shade "01". It applies smooth and has incredible staying power.

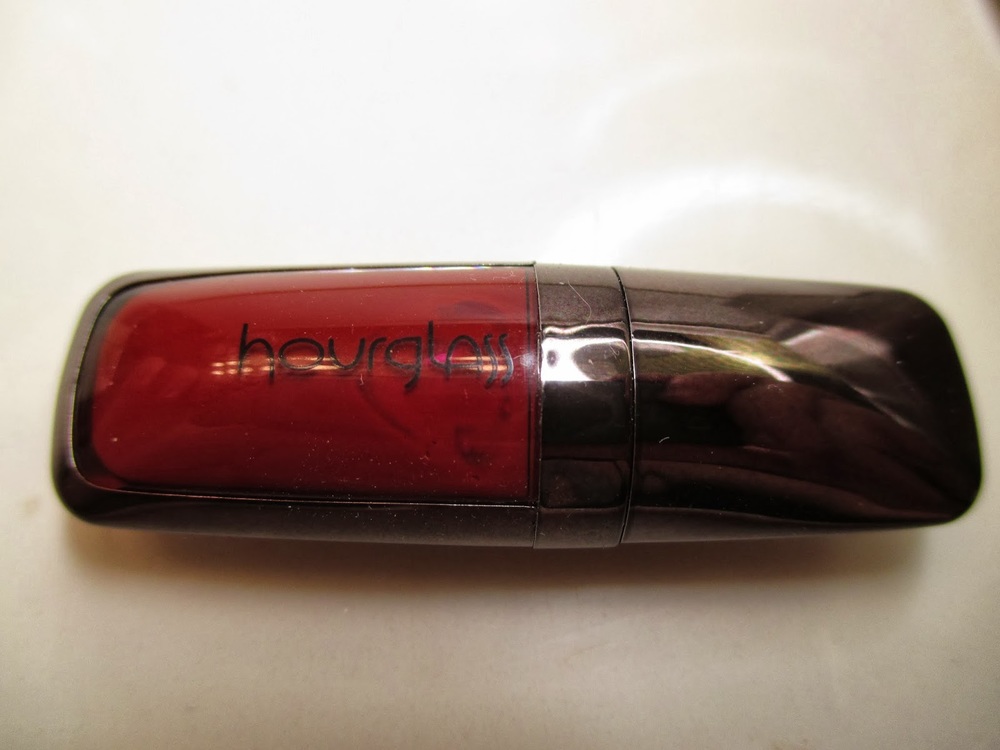
The final step is to add the luxurious Hourglass Liquid Lipstick in the color "Icon". I desperately want the full size of this and I want to try the lipstick in this color as well, however is it a bit on the pricey side, so considering I bought it around Christmas time, it will have to wait. This product applies very wet, but quickly dries to a deep, matte, red color that is quite "vampy". Though it is expensive, this product is wonderful and I would definitely say it is worth the investment.
These three products make for the prettiest lip combination. Here are the swatches on both my hand and my lips below.
Love these blogs!
Zoella
Tanya Burr
Thanks for Reading, hope you enjoyed!! :)
Have a lovely day!! xoxo
HaileyGrace